For my new studio in our new basement, I needed a bigger desk. For a few weeks I was considering systems like the Bedford collection from Pottery Barn but when I started to add it all up, it was going to be over $1,000, possibly closer to $2,000 considering the lengh of desk that I needed/wanted. Ouch. I didn't want to break the bank for the desk, however, I also didn't want to sacrifice style, or function. Instead of multiple digits for this size of a desk, it worked out to be $300.00. :) So here is the desk I made (yes, made) combining Ikea, Home Depot, and a little elbow grease.
Instructions are below, but the short version of the how-to is that we took three IKEA units and created a custom desktop out of wood from Home Depot.
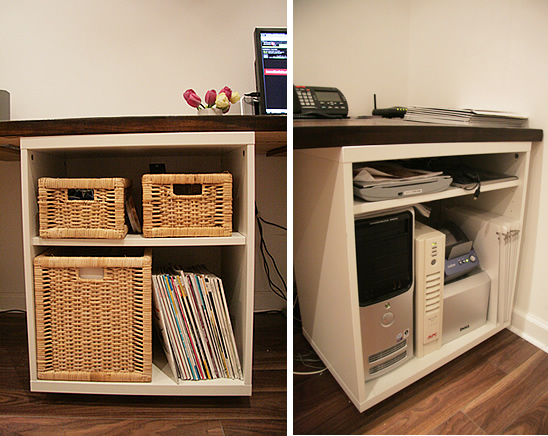
Picture on the Left: Instead of drawers, I added Ikea baskets that fit perfectly. In each basket, "like items" are sorted together. Right beside my chair is a little basket with pens and pencils. Other baskets hold paint chip decks, camera cords, and items that I need on a regular basis.
Picture on the Right: This Ikea base unit serves as awesome storage for all of that computer stuff I wanted to keep off my desk. It holds my CPU unit, my subwoofer, battery backup...all the stuff that you need, but don't want to see. I put the top shelf higher on this unit, allowing room for the CPUT unit, but the top shelf holds my Graphic Tablet and Scanner, that I pull out when I need to use it.
Step 1: Measure the lengh of your area. I wanted my desk to be 129" in lengh.
Step 2: Buy the wood, rent a van / We bought three planks of pine from Home Depot, had them cut to be 129" in lengh and rented a Home Depot Van to get them home. We pre-calculated that the three planks together, placed side by side, would create the best depth for the desk.
Step 3: Sand, Sand and Sand some more / When we got them home, I sanded down three planks and decided which plank would be at the front of the desk, so I could pay extra attention to the edge that I would be sitting against. The sanding not only smoothed it down (the edges in particular) but the process helped removed markings that were there like a "Made in Canada" ink stamp and some other were just ink marks.
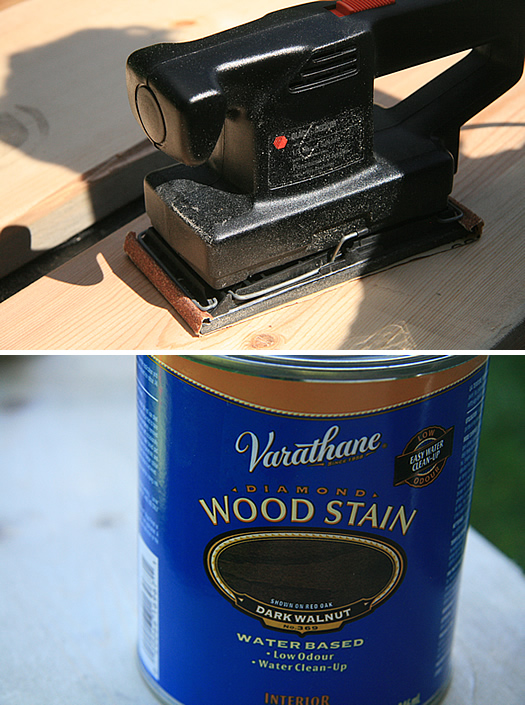
(Above, My power sander, given to me by a neighbour, and Varathane Walnut Wood stain)
STEP 4: STAINING
I bought Walnut Stain, water based, from Home Depot. To apply, I used a foam brush, although any brush would do. I combined the staining with a rag. Since it's waterbased you can get really into it with bare hands, and your hands aren't going to be stained forever.
STEP 5: Varathane
I did 2-3 coats of the stain. The thing to remember is when it's dried, it looks a bit "bleh", but when I applied the Semi-gloss varathane on after, it makes it REALLY pop. I wish I had sanded again as since being installed in the studio, there are some rough patches.
STEP 6 - Building the base wih Ikea Cabinest
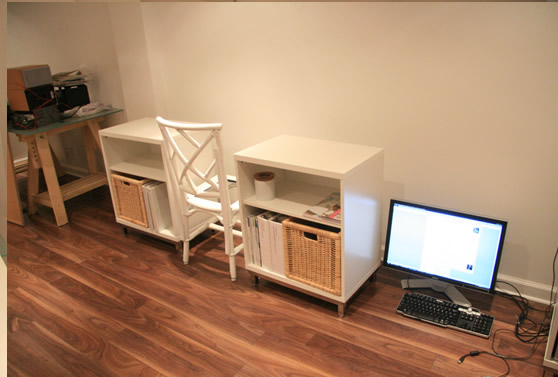
Back in the studio, we built three Ikea Besta Cabinets ($65 each). We initially bought the silver legs to go with them, but after adding the top on to the bases, the desk heigh was WAY too high so the legs came off + we returned them.
But... there is an issue. The depth of the desk top, is deeper than the base cabinets. So the back plank, was REALLY wobbly.
STEP 7: Securing the planks together
We needed to bring each plank into the house, piece by piece, and secure them together once in the house. If we had secrued them together outside, we would have never gotten them in the doorway. Once we got the planks ino the house, we got them lined up together.
Once lined up, we secured all three planks together with leftover wood. and installed an L bracket from the table top, to the Ikea cabinet.
What we did was create hidden legs behid the 2 of the Ikea base cabinets by getting 4x4 posts, cut to the right size @ Home Depot. We secured the legs to the desk top. You can't see them when you're in the office, but they are VERY necessary in order to keep the desk secure. Since it's such a long desk, we did a lot of "procautions"
We had to raise the Besta units by placing wood underneath until it got to the desired height - you can see it right now in the picture above, but we'll be adding trim so it will be hidden.
Summer 2011 Update...We added an extra shelf beneath for more storage.
skip to main |
skip to sidebar
Top Articles
Recommended Sites
Popular Posts
-
As a blogger I am always editing my posts for clarity and length. A link on Making it Lovely called, Your E-Mails are Too Long". mad...
-
I was browsing my local HomeSense last week and was hit with a wonderland of outdoor accessories. It is the mecca for all things in your ga...
-
After renting the Lowes van last night we got the new back door into the house. When we install it, is debatable. :) For now, it sits with u...
-
On top of being a crazy decorating/renovating Mom, Wife and crafter, most of you know that I am also a business owner. Since 2004 I've r...
-
On the heels of our previous post about how to hide a gas meter , here's our project of how we're hiding our electrical panel. As mu...
-
We don't have a doorbell but instead a gorgeous brass knocker on our front door. Love the look, but people feel the need to whack it REA...
-
Although I love my magazines, my blogs, my Pinterest searches and Google image search, sometimes finding inspiration is a matter of snooping...
-
I was invited to attend the West Elm media preview last week to see what's new in the store. I adore this store. I feel like everyone i...
-
One thing that happens a lot in my house is I start to do laundry, and it piles up and sits at the foot of the basement stairs. I can't ...
-
This week has been utterly boring . I've been painting the new trim around the windows. A task I now loathe as I feel as though I'm ...
Blog Archive
-
▼
2009
(100)
-
▼
August
(21)
- DIY - Make your own desk
- Front Door, Changing of the Seasons
- Desk project, Step #1
- White Oil Paint Yellows.
- Lilac pillows
- Creating storage
- Painting floors white, some resources...
- Spare Bedroom, Painting the floor White
- Moving the office
- New backdoor has arrived!
- Hiding an Electrical Panel
- Meet our Foreman/woman
- Brick cleaning
- Laminate Done!
- Garden Improvement, Chapter 3
- Ikea 2010 Catalogue
- Installing laminate
- Desk transformation
- Filling up the house with art...
- Picking trim
- Hiding the Gas Meter
-
▼
August
(21)
Copyright © 2013. Beauty Home Design


0 comments:
Post a Comment